The Add \ Edit Record is where you enter all information for the cardholder, select the color code and capture the photo if needed. Fill in the different fields, click Capture Photo ID and click Save Record. A new record appears in the Records List table. Each time you save information about a new cardholder, a serial number is generated. It is a unique number that is automatically created by the software, which serves to identify every cardholder separately. It is also useful for quick information retrieval.
Tab
Toolbar
- Add Record – Create a new record.
- Duplicate Records – Duplicate the current record. The New Record will open but with all the fields already filled in with the record selected. Modify the field you want (usually the first name and last name) and click Save Record; a new record will be created, and you will be sent to the Record Information This feature is a very useful timesaver when you need to enter a family and just need to change the first name, or when you enter staff from the same company and only the first name and last name changes.
- Move to Inactive – Move the record to Inactive so that you can’t print the record anymore.
- Move to Trash – Remove the record from everywhere except for Administrator.
- Capture Photo ID – Capture a photo ID that will be printed on the card if needed.
- Import Photo ID – Import a Photo ID from a file that will be printed on the card if needed.
- Edit Photo ID – Crop and Rotate the Photo ID.
- Save Record – Save the record to the cloud.
- Preview Card – Preview a low-resolution image in the browser.
- Print Preview – Preview how the card will look before sending it to the card printer.
- Request Print – Add the print to the Print Center to print cards remotely.
- Help Center – This help page.
Some features might not be available, depending of your plan.
Status
By default, new records are Active and can be printed right away.
| New | Active | Lock | Inactive | Trash |
| New records are visible in Record Information for users with assigned project privileges. | Active records are available in Record Information for users with assigned project privileges. | Lock records are pending in Print Center and available only in IDpack Enterprise accounts. | Inactive records cannot be printed, except by users with Administrator privileges. | Trash records cannot capture Photo ID or be printed. Administrators can delete them. |
Color Code
The Color Code is a powerful feature available only with IDpack. If you are not using the Color Code function, we suggest you disable the pull-down menu. Under the Designer / Edit Setup. Choose Disabled in the Color Coding option. The pull-down menu will be hidden and the New Record window will be a little smaller. Please read more about its features in the Designer / Color Code page.
Fields
The names of the input text (First Name, Last Name…), max length, mandatory, default value, etc.… can all be modified under the Designer / Field Definition tab. Please read the Field Definition sub-section to learn more.
Capture Photo ID
The Capture Photo ID function works with the Record Information tab. On the Capture Photo ID frame, you can see Live Camera and Saved Photo ID. The Live Camera provides a preview of your image. Click  Capture Photo ID to take a photo with the camera. You can click on the button as many times as you want; only the last captured photo is saved. Each time you click on the button you can see the result in the Saved Photo ID frame. The last Saved Photo ID is the photo that will be used to print the card.
Does IDpack see what my webcam sees? No, we cannot see the live feed on your webcam; only the photo you’ve captured is sent to our server. You are responsible for the content that you post to IDC, including its legality, reliability, and appropriateness. Please read our Terms of Service for more information.
You can change the video source using the pull-down menu. Example: You are working with a laptop but want to capture a Photo ID from a webcam with people in front of you? Just select the other webcam in the pull-down menu and IDC will switch to that camera.
Print Badge
Print Preview is the final step before sending the card to your card printer. WYSIWYG is an acronym for “what you see is what you get,” and the preview is exactly what will be printed. No need to test what it will look like, it’s going to look exactly the same. A great way to save on cards and ribbons, if you see something wrong, you can always go back by clicking on the different tabs, make changes and see the print preview again. You can also have two browser tabs open, one with Designer and one with Producer. Make the changes in Designer, go back to the Producer tab and click Reload to refresh the Print Preview to see the changes live.
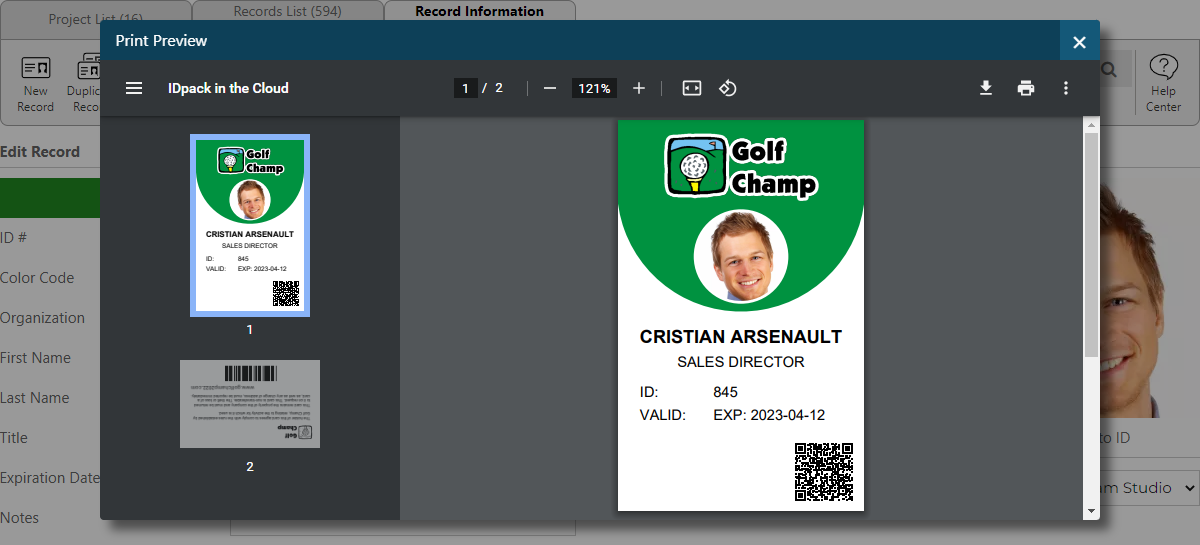
Once you are ready to print, click the Print Preview button and a pop-up will show up.

Click the printer icon (circled in red at the top right). This will open the print dialog. The icon and dialog may vary depending on your printer model, operating system, and browser.
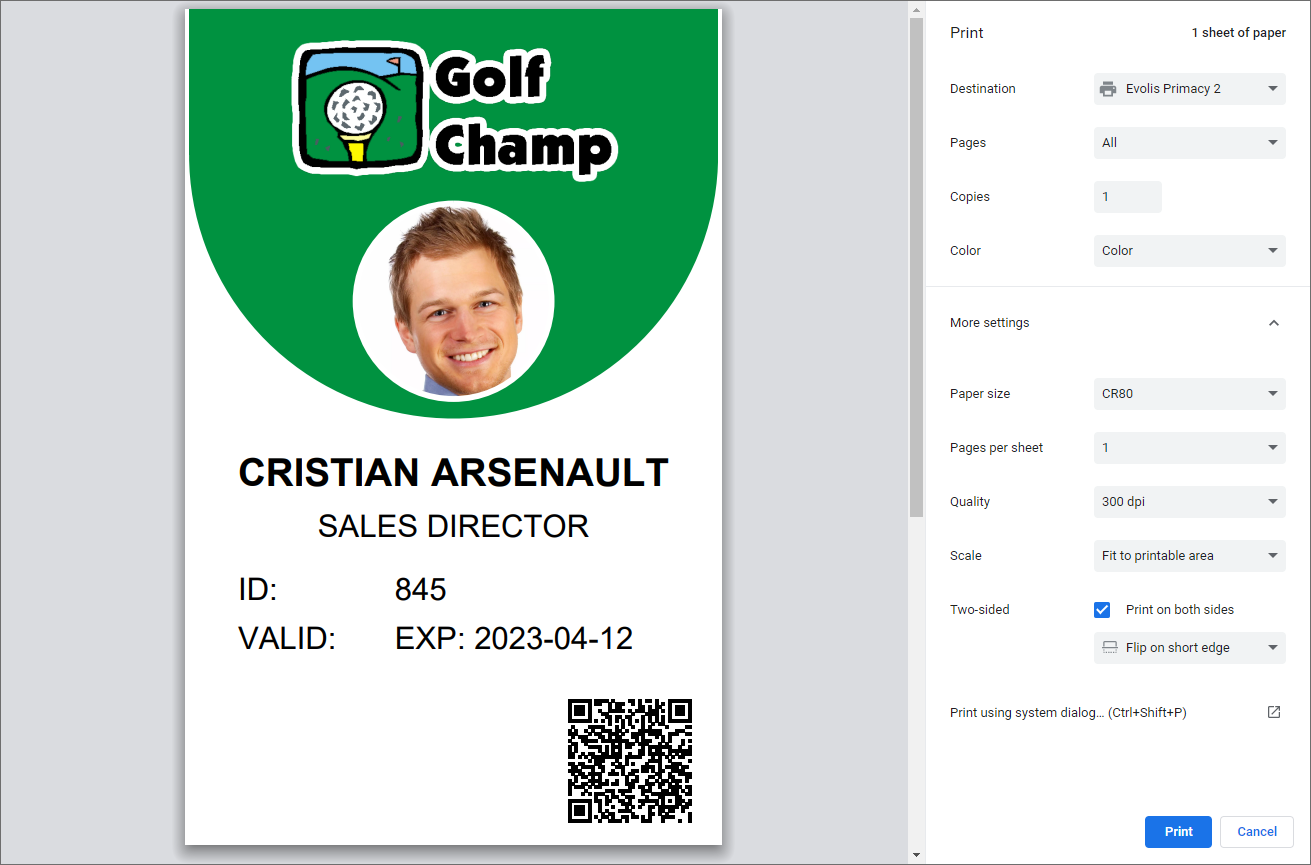
In the Destination field, select your card printer. Below, you will see the standard print options. For more controls, click More Settings:
- Adjust the Scale to match your printer configuration.
- If printing double-sided, enable Print on both sides and set it to Flip on short edge.
When everything is set, click Print to start printing your badge.
Congratulation, you have printed a card with IDpack.
Delete Record

Only users with Administrator role can permanently delete a record. Click a record row in the Records List and go to the Record Information tab. The record status must be: Trash to be deleted. Click Move to Trash if its not trashed yet. Now, to delete the record, scroll to the bottom of the screen and click Delete. The record and everything related to the record selected will be deleted permanently.
WARNING: There is no way back; by deleting a record, it will delete all the information related to it: record, signature, and Photo ID. Where security is concerned, the more information you have available, the better it is. We always recommend not to delete a record but leave it in the trash. Please don’t contact us to restore deleted information, we can’t do anything once it is gone.