SoapUI API Client
Built for developers and testers, SoapUI is the only free, open-source tool that covers the entire testing spectrum (functional, security, load, mocking). With its easy-to-use graphical interface, SoapUI is the entry point for API testing, allowing you to quickly validate REST, SOAP, and GraphQL-based web services. Get the open-source version of the world’s most widely used API testing tool below. You can download SoapUI here: https://www.soapui.org/downloads/soapui/
What is a REST client?
A RESTful API has three main usage elements: the client call to the API, the API interface, and the server. The uniform interface is like a switchboard between the client and the server, confirming that the client can send HTTP requests to the server. It then responds with the requested data.
REST is an architectural style that standardizes stateless HTTP communication in client-server relationships. It is not a language like HTML or XML but a set of rules API developers must follow to communicate with other RESTful APIs.
What does the REST client do?
The REST (REpresentational State Transfer) client initiates the request to the API. All kinds of different REST clients exist, but whether it’s Google Maps or Timezone, it’s the same process of the REST client issuing an HTTP request to the API interface.
REST Client Request Format
The request header specifies what kind of content the client expects and can receive from the server. This is called the Accept field. An example of a common accept field is “application/json”, specifying that it will receive a JSON file in the response. Each request routed through the API is authenticated and retrieves or stores data in the server on the other side.
- Open the SoapUI and click New REST Project.
- In the dialogue box, enter the following URL: https://api.idpack.cloud/producer/
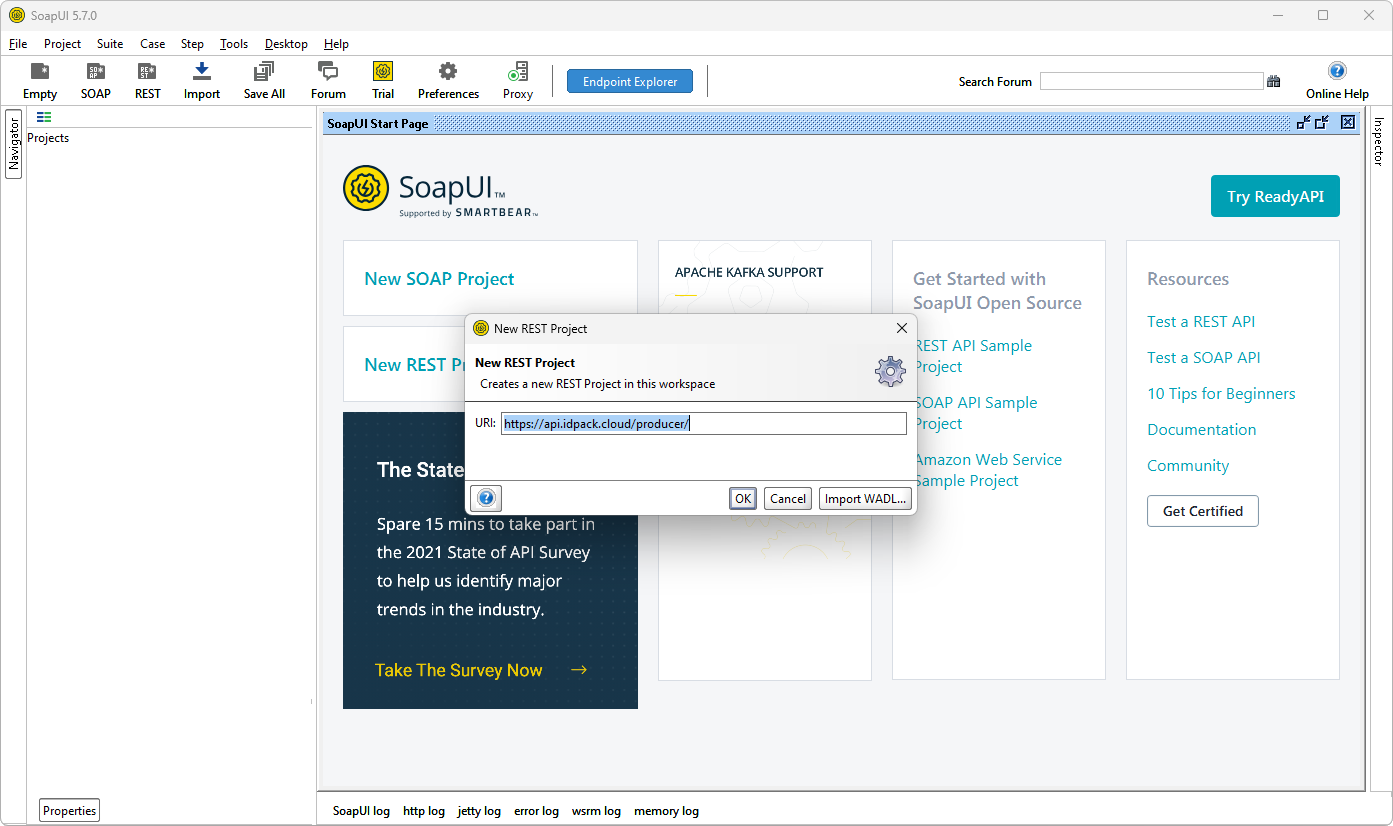
- Click OK.
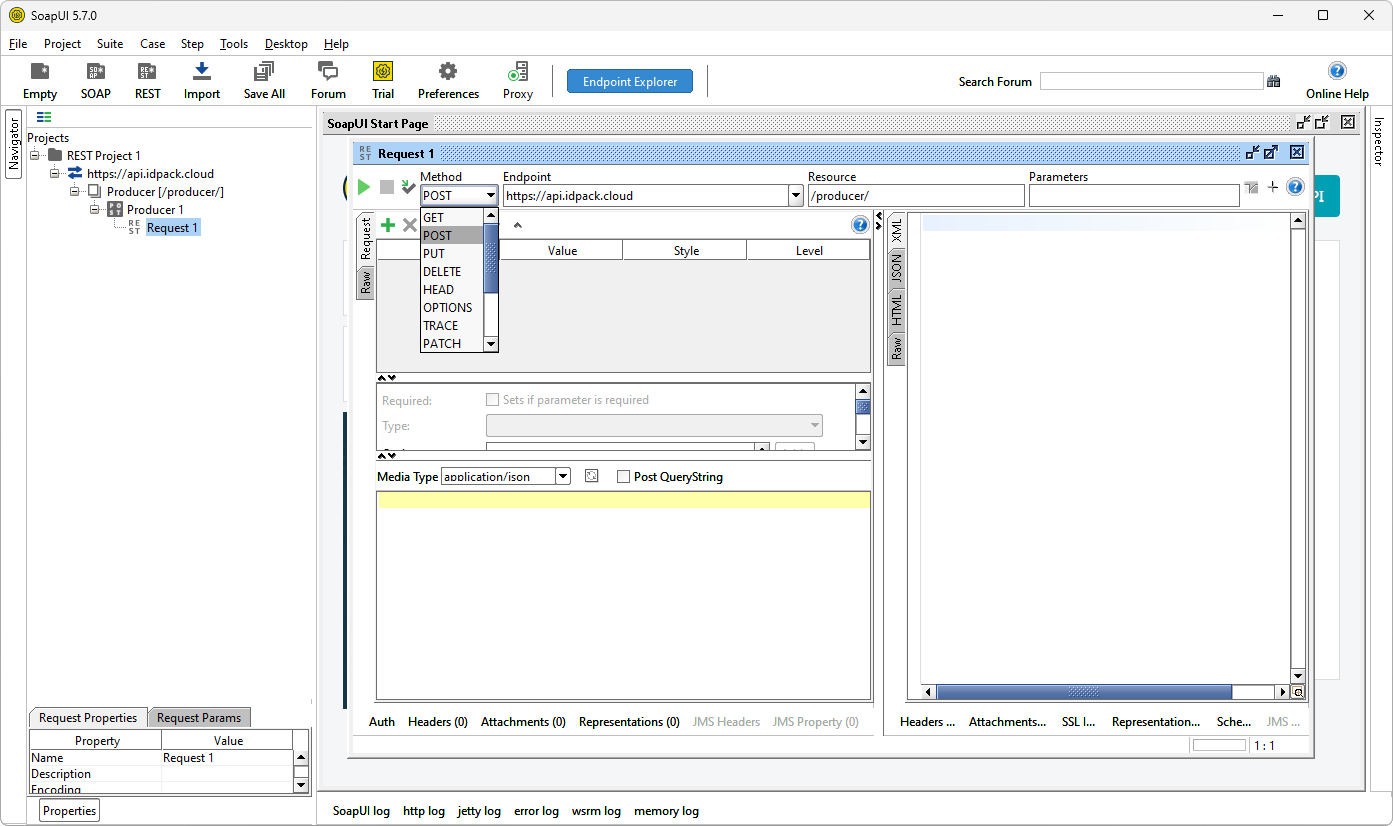
- Select POST from the drop-down list in the Method box.
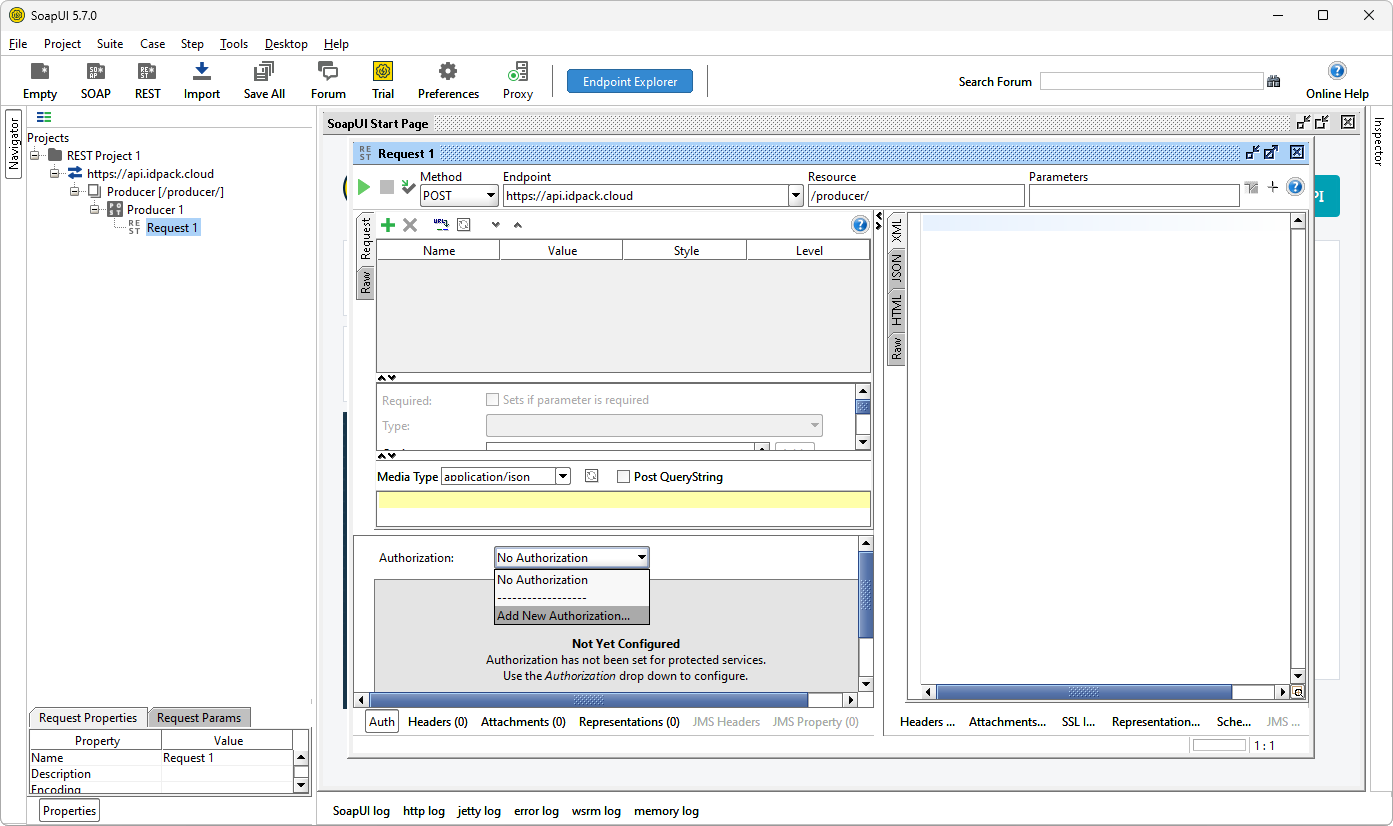
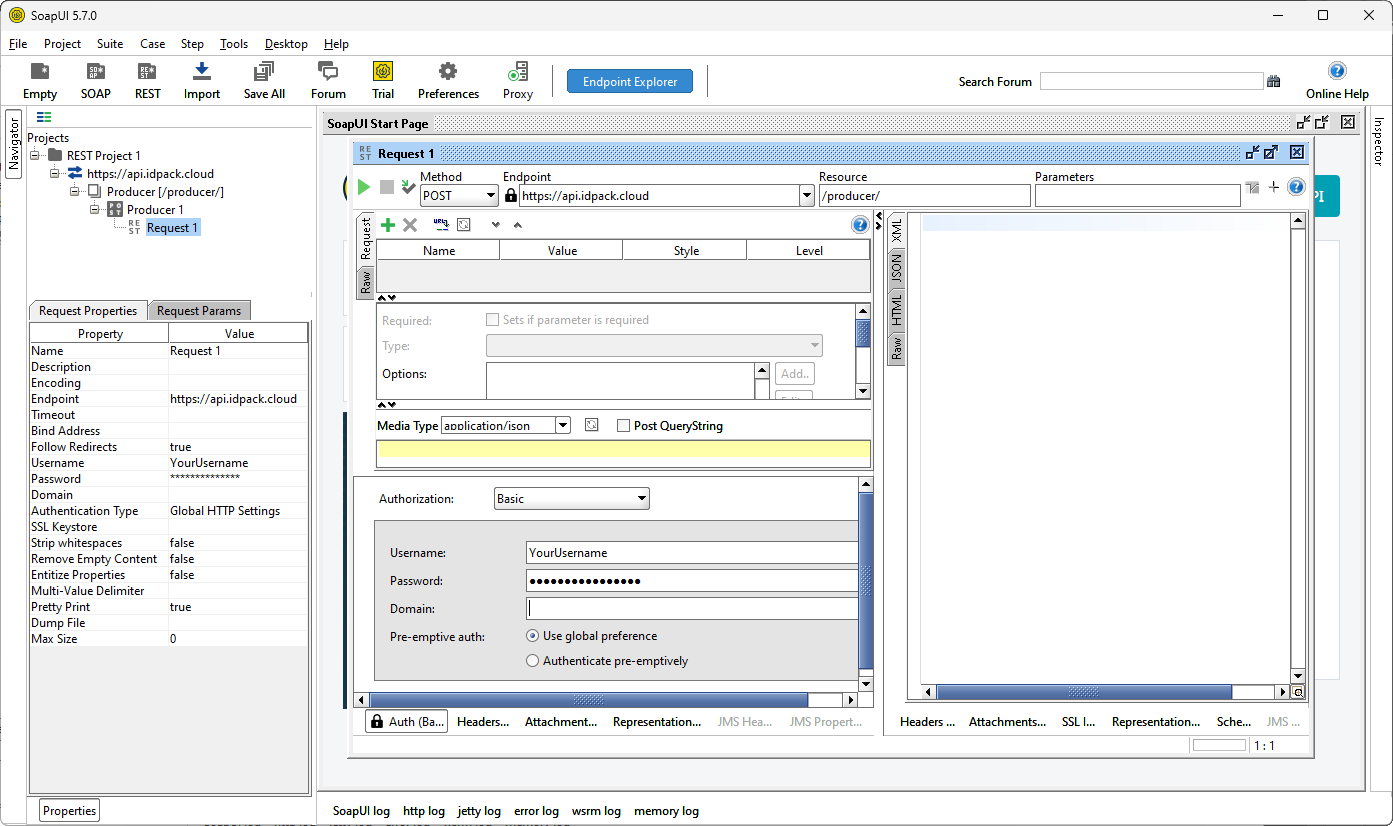
- Click on Auth at the bottom and select Add New Authorization from the drop-down list.
- Select Basic and click OK.
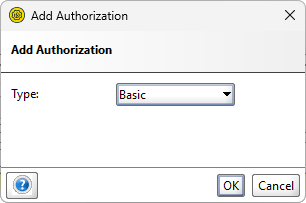
- Enter your Username and Password.
- Click on Headers (0) to add additional HTTP headers.
- Click the green + button and add all three headers below.
Header name Value Accept-Language en-US Accept application/json Content-Type application/json 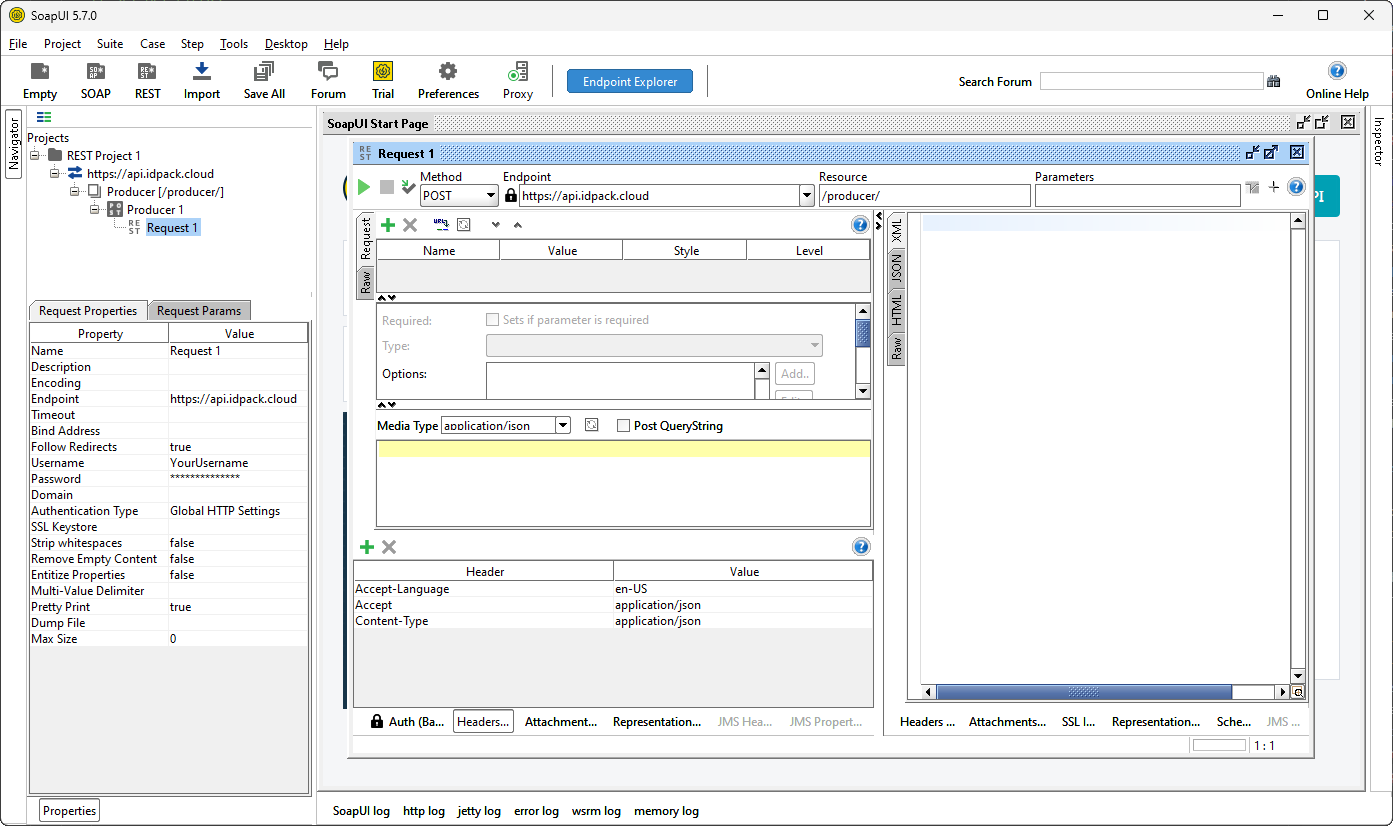
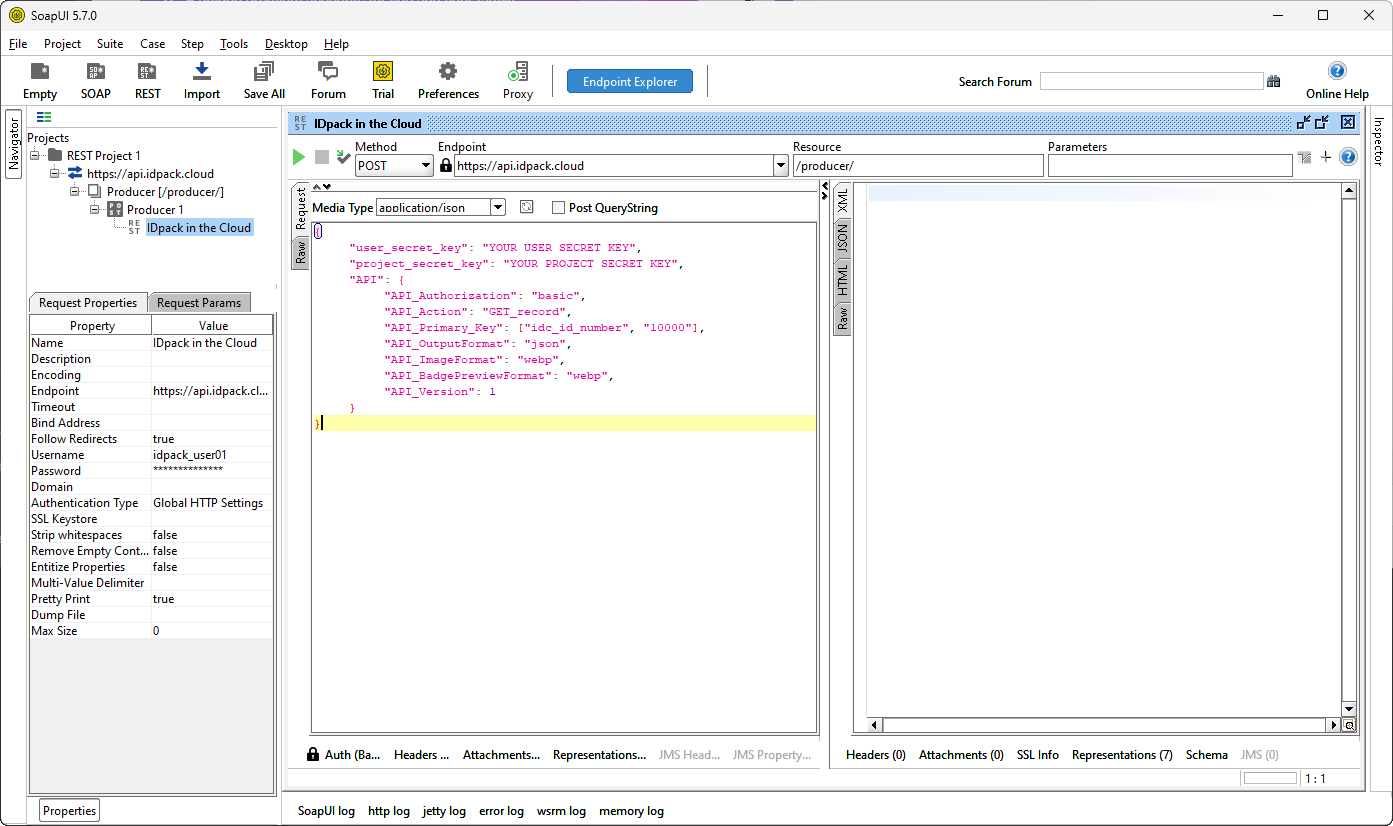
- Select application/json from Media Type drop-down list.
- Type the Payload in the Media Type box.
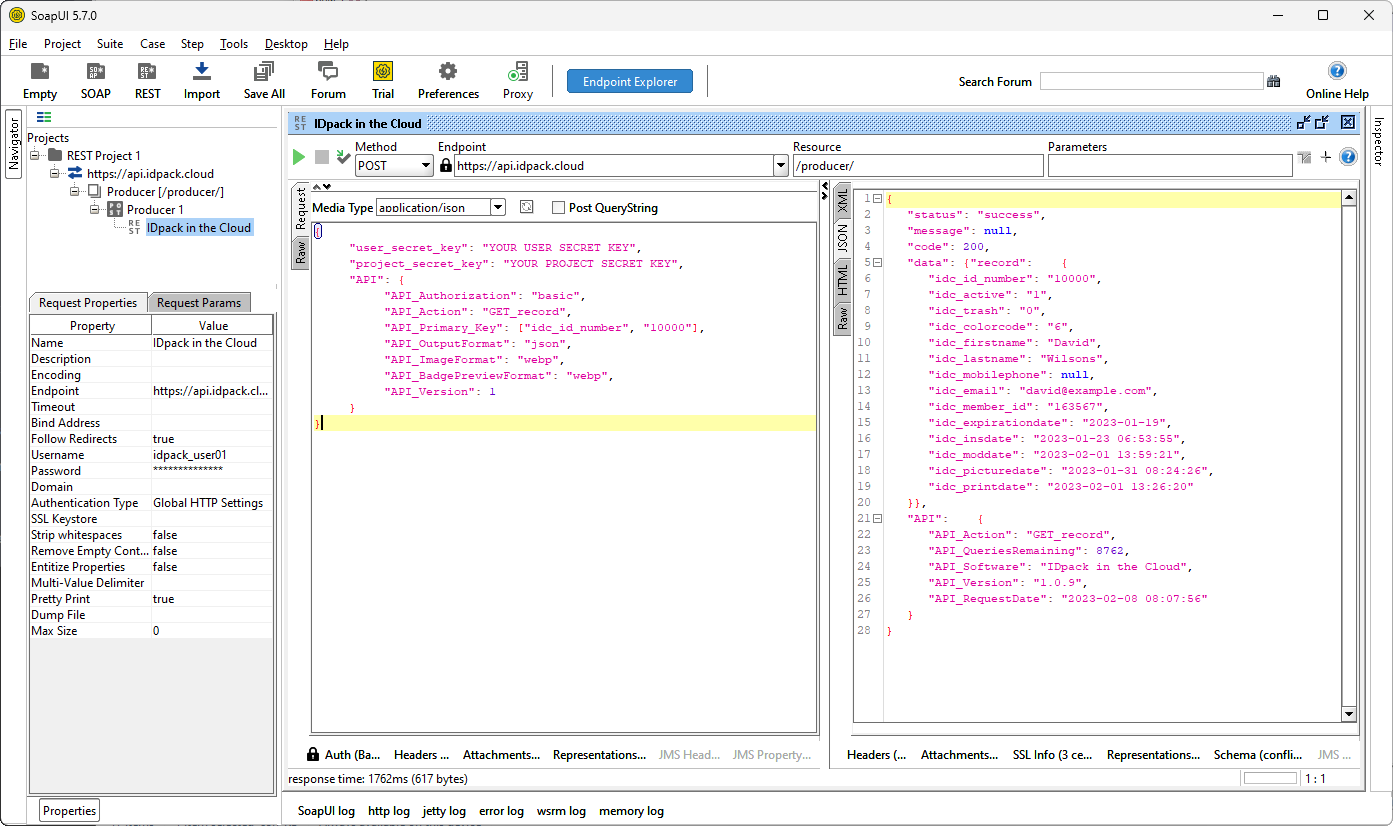
- Submit the request by clicking the green arrow. Once the request is completed, you will view the output in the right-side dialogue box.
Create a New REST Project
Authorization
Additional HTTP Headers
Payload
Submit Request
Et voilà!