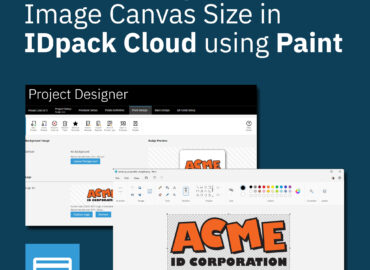
When working with Import Photos (.zip) workflows, or image uploads in IDpack, you’re often asked to meet specific image size requirements such as 450×450 pixels and file sizes under 120 KB. Manually resizing dozens or hundreds of photos can be frustrating and time-consuming. Thankfully, there’s a simple and free solution for Windows users: Microsoft PowerToys.
In this post, we’ll walk you through how to quickly shrink all images in a folder to match IDpack specifications using PowerToys, especially when preparing assets for Business, Enterprise or Professional.
For Apple, see How to Resize Photos for IDpack Import Using Apple Shortcuts
What is Microsoft PowerToys?
Microsoft PowerToys is a free set of utilities that enhances Windows productivity. One of the best features is the Image Resizer, which integrates directly into File Explorer (right-click menu), allowing you to resize multiple images at once. This is ideal for IDpack badge photo submissions.
Why Use PowerToys for Image Resizing?
- Fast: Resize hundreds of images in seconds.
- Integrated: No need to open each file. Just right-click and resize from the folder.
- Customizable: Set exact dimensions like 450×450 pixels.
- Reliable: Created by Microsoft, safe and actively maintained.
Step-by-Step: Resizing Images with PowerToys
- Download and Install PowerToys
Visit the official page: https://github.com/microsoft/PowerToys/releases
Download the Per user – x64.exeunder “Assets” for the latest stable version.
Run the installer and follow the prompts. - Enable Only the Image Resizer Module
After installation, open PowerToys Settings.
- On the right panel, you’ll see a list of available PowerToys modules.
- We recommend disabling all other modules and leaving only Image Resizer enabled for simplicity and performance.
- Click on Image Resizer and make sure the toggle at the top is turned on.
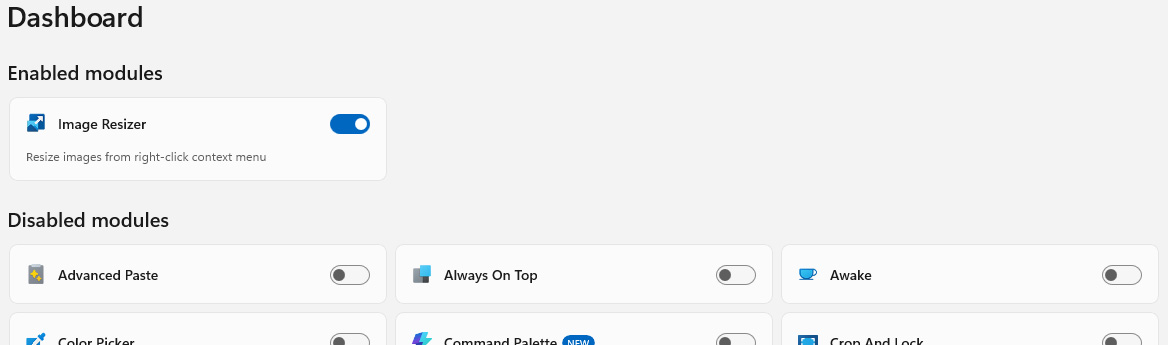
This ensures PowerToys runs lightweight and only handles the task required for your IDpack image resizing workflow.
- Select Your Images
Open the folder containing your photos.
Use Ctrl+A to select all images, or hold Ctrl and click to select specific ones. - Right-Click and Resize
Right-click on the selected images.
Choose “Resize with Image Resizer” from the context menu. - Create a New IDpack Preset
When the Image Resizer window appears for the first time:
- Click the gear icon in the bottom-left corner to open settings.
- Under Image sizes – Presets, click Add new size.
- Click the pencil icon next to the new size to edit it.
- Configure the preset as follows:
- Name: IDpack
- Fit: Fit
- Width: 450
- Height: 450
- Unit: Pixels
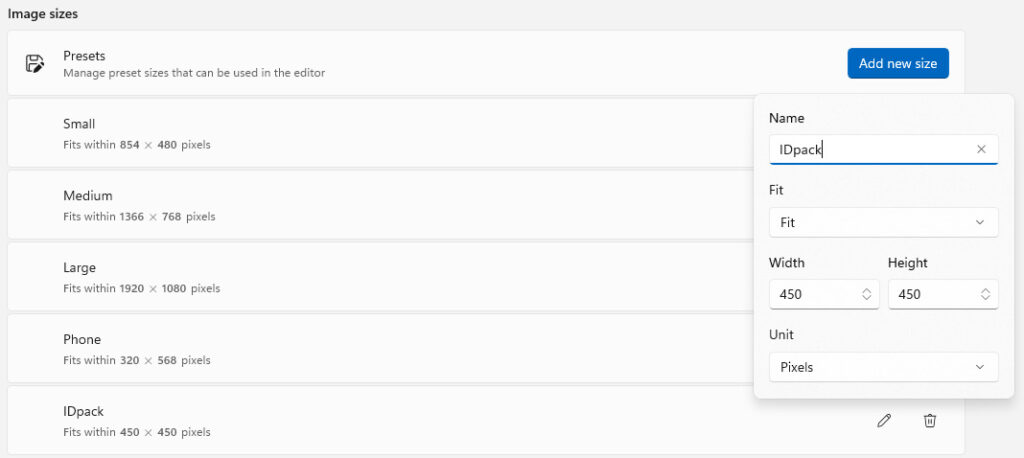
- Click the X to close the window.
- The IDpack preset is now available in the size dropdown. Select it if it’s not already selected by default.
- Click “Resize”
Before clicking Resize, we recommend reviewing the following checkboxes in the Image Resizer window:
- Make pictures smaller but not larger – This prevents PowerToys from upscaling images that are already smaller than the target size. Upscaling can degrade quality and increase file size unnecessarily. Leave this option checked.
- Ignore the orientation of pictures – When enabled, PowerToys will ignore orientation tags embedded in photos (like those from mobile devices). This helps avoid unexpected rotation during resizing. Recommended to keep this checked unless your photos are already properly rotated.
- Overwrite the original files – This replaces your original images with resized versions. Only check this if you’ve already backed up your originals. Otherwise, leave it unchecked to create separate resized copies.
- Remove metadata that doesn’t affect rendering – Strips EXIF and other non-essential metadata (e.g., GPS coordinates, camera info). This reduces file size without changing how the image looks. It’s safe and recommended to check this.
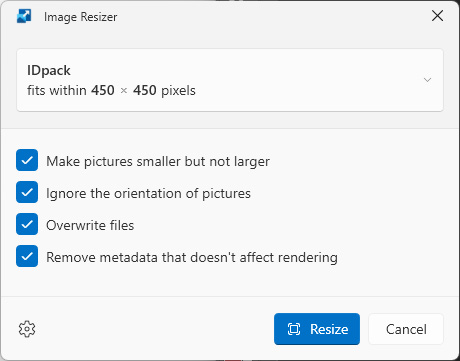
Once all settings are verified and your preset is selected (e.g., IDpack), go ahead and click Resize. PowerToys will process all selected images and save the resized versions in the same folder (or overwrite if that option is enabled).
- Create a ZIP File for Upload
Once all images are resized to the correct format using the IDpack preset, you’re ready to package them for upload.
- Navigate to the folder where your resized images are located.
- Select all images using Ctrl+A, or hold Ctrl and click to choose specific files.
- Right-click the selected images and choose Compress to ZIP file.
- Rename the resulting ZIP file to match your project or any name you prefer.
Your ZIP file is now ready to upload into IDpack using the Import Photos (.zip) feature.
Pro Tips
- Back up original images if you’re not sure whether you’ll need the full-size versions later.
- If your original photos aren’t square, choose “Fit” mode to prevent distortion.
- Try a few images first to verify size and quality before doing your full batch.
Final Thoughts
PowerToys Image Resizer is a hidden gem for anyone dealing with image uploads or printing tasks. Whether you’re preparing a batch of ID photos, submitting documents, or optimizing web content, it makes the process effortless and precise.
If you’re working with IDpack, resizing images to the correct specs ensures faster uploads, fewer errors, and sharper printed results during the Import Photos (.zip) process.
Disclaimer: IDpack is not affiliated with Microsoft and does not provide support for PowerToys or any third-party applications mentioned in this guide. Use of PowerToys is at your own risk. IDpack assumes no responsibility for any loss of data, image quality, or system errors that may result from using this or any external software. Always back up your original files before performing batch operations.