 Panel")
Printing with the Fluorescent (F) panel (commonly referred to as UV) on the HID FARGO HDP6600 adds a sophisticated security layer to your ID cards. This guide explains how to configure IDpack to utilize the HID FARGO 084916 YMCFK ribbon for high-precision, 600 DPI security printing with exceptional detail.
Prerequisites
- Hardware: HID FARGO HDP6600 Retransfer Printer (single or dual sided).
- Ribbon: HID 084916 (YMCFK) specifically.
- Software: IDpack Professional or IDpack Enterprise plan.
- OS: Windows 10 or 11 (Driver-dependent).
Create a New Project in Designer

To follow this guide, start by creating a new project in Designer. For demonstration purposes, this example uses the template Basic Series 06 (#122501) from the IDpack template library, with the following modifications applied to the Front Design:
- Change the width dimension of the logo Image object to 37.00 and replace it with your organization’s logo.
- Delete the QR code object to make space for the UV artwork.
- Remove the bottom Text Dynamic Employee ID object so it can be recreated in the UV layer.
Technical Concept: The Ribbon Sequence
To achieve professional results, you must understand the HDP6600’s physical printing order:
Y → M → C → F (Fluorescent) → K → Clear Film → Card (Retransfer)
Critical Design Rules:
- Avoid Overlap: UV glows best on a white PVC background. If you print Color (YMC) underneath the UV layer, the glow intensity drops significantly and may reduce the intended security effect.
- Avoid Blockage: The Black (K) panel is opaque. If you place black text or barcodes over your UV design, the UV element will be physically blocked.
- Monochrome Output: The F-panel is monochrome. IDpack automatically converts all UV design elements to grayscale. Only the intensity (darkness) of the gray determines how much fluorescent material is applied.
Step 1: Enable UV Printing in Designer

- Open your project in IDpack Designer.
- Navigate to Project Settings.
- Locate the UV Panel Printing dropdown.
- Set it to Front, Back, or Front and Back. (For this guide, we use Front).
- Locate the Printer Model dropdown.
- Set it to HID FARGO – HDP6600 to enable native 600 DPI output support.
- Click Save Project.
Once saved, a new tab labeled Front UV will appear in the main navigation toolbar next to your standard design tabs.
Step 2: Create the UV Design

Click the Front UV tab. You will see a design selection screen similar to the Front Design tab. This layer is independent of your standard color design.
- Choose Blank Badge to start with a clean slate.
Remember: Everything you place here prints only on the Fluorescent panel.
Step 3: Adding Advanced UV Security Elements

We will now add three specific objects to demonstrate the power of the HDP6600.
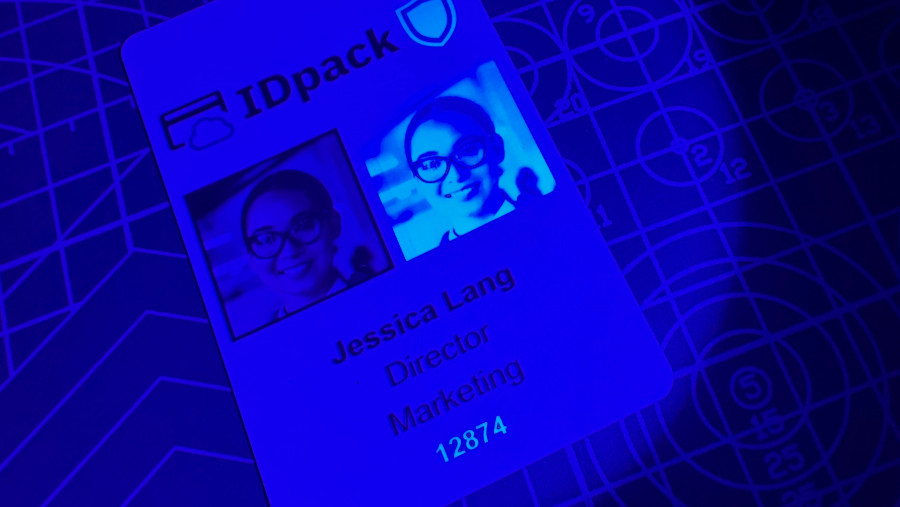
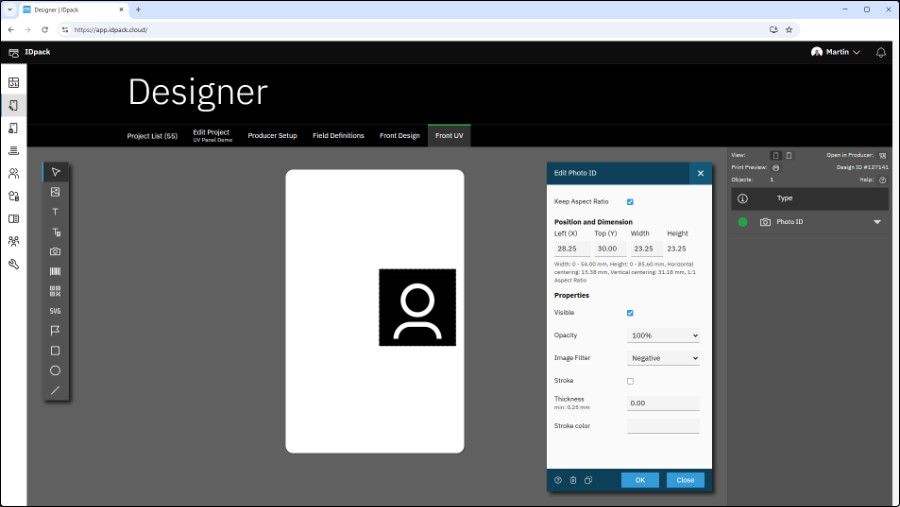
1. The “Ghost” Photo ID (Security Best Practice)
- Add a Photo ID object.
- Set the Position and Dimension to: 28.25, 30.00, 23.25
- In the properties, set Image Filter → Negative.
- Click OK.
Why? Inverting the image ensures that when viewed under UV light, the “glow” mimics a natural photographic positive.
Tip: Use the Photo ID Background Removal tool. Printing just the floating “ghost face” in UV is a high-tier security feature. We highly recommend using the Photo ID Background Removal feature (can be activated in the same Designer setting screen). Token usage applies.
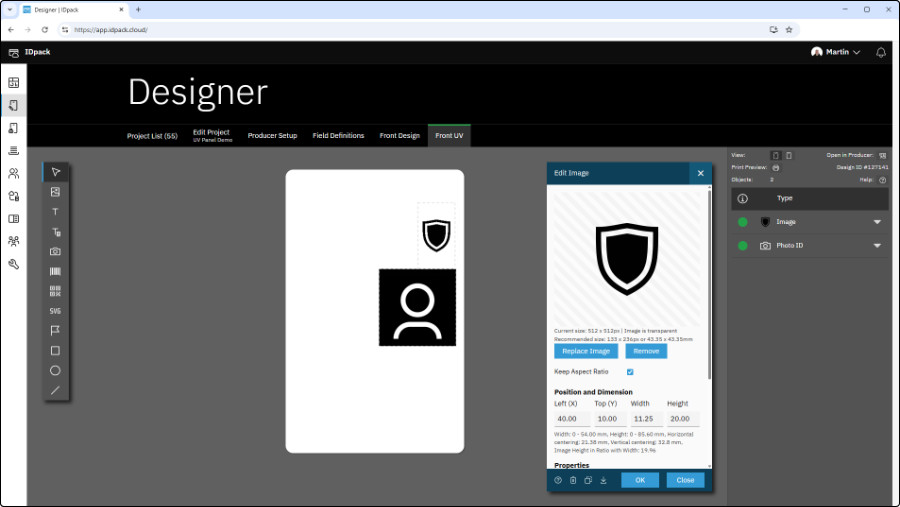
2. High-Contrast Logos
- Add an Image object, click Upload Image and select an image or a logo.
- Set the Position and Dimension to: 40.00, 10.00, 11.25, and 20.00
- Click OK.
Tip: Use high-contrast, black-and-white versions of logos for the sharpest UV reflection. You can also apply image filters, but it is not necessary. For UV work, high contrast produces better results.
3. Variable Data (UV Micro-printing)
- Add a Text object.
- Set the Position and Dimension to: 2.5, 76.00, 49.00, and 6.00
- Set the Horizontal Align to: Center
- Set the Font style to: Bold
- In the Content (Text and Shortcodes) field, enter:
[employee_id]. - Click OK.
This will print the Employee ID of the cardholder in UV only. This “hidden” variable data makes cards nearly impossible to counterfeit.
Step 4: Add Record and Print Preview in Producer

- Click Open in Producer (top right icon).
- Add a dummy record (First Name, Last Name, Title #1, Function #1, and Employee ID) and capture a Photo ID or import a Photo ID.
- Click Save Record.
- For testing, print one card without Remove Background, then enable it and print a second card to compare the difference.
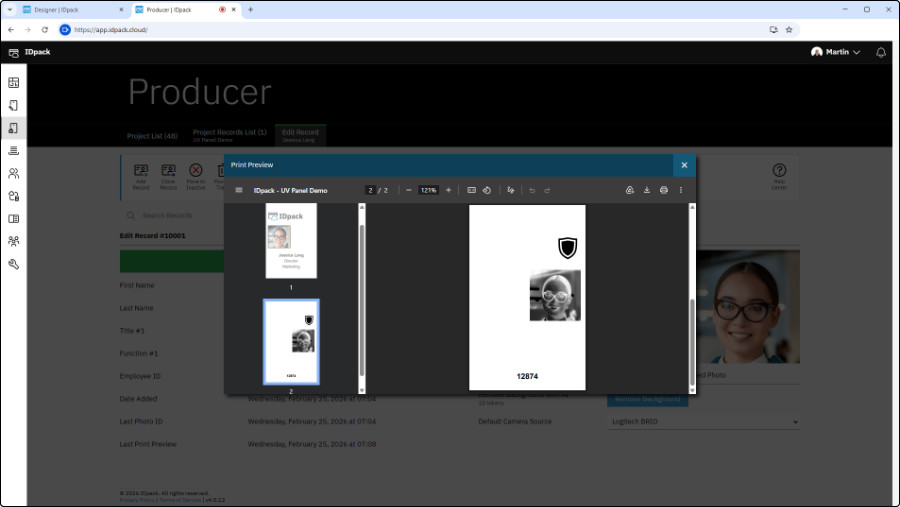
- When ready, click Print Preview.
Note for Visual Clarity: You will now see an additional page in the preview (Page 2). If Front UV is enabled, the UV artwork appears as Page 2. It will appear in grayscale and the Photo ID will look inverted. This is normal and confirms IDpack is ready to send the F-panel data to the printer.
Step 5: Printer Configuration (One-Time Setup)
You must be a Windows Administrator to save these settings. This step only needs to be done once per workstation.
Click the Printer icon in IDpack Producer.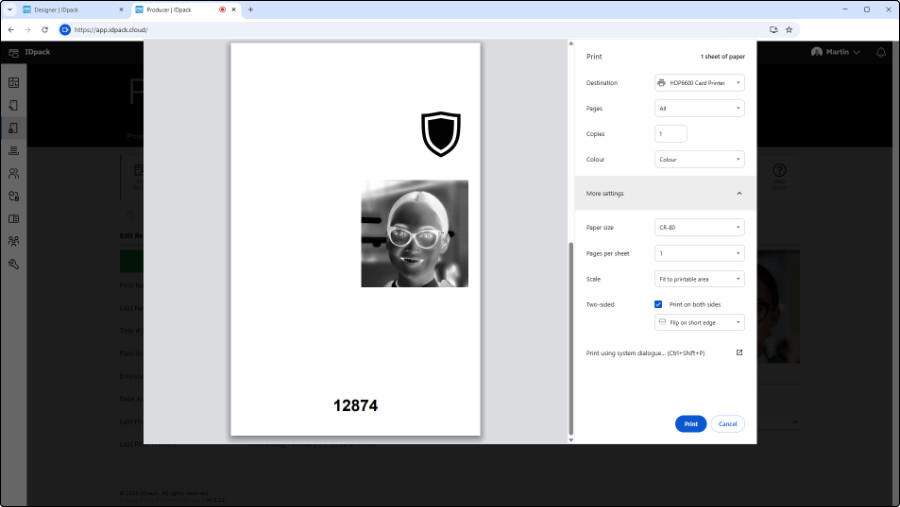
In Google Chrome, click More settings and select Print using system dialog (Ctrl+Shift+P).
A Windows dialog called Google Chrome – Print will open.- Make sure HDP6600 Card Printer is selected and check the box: Let the app change my printing preferences.
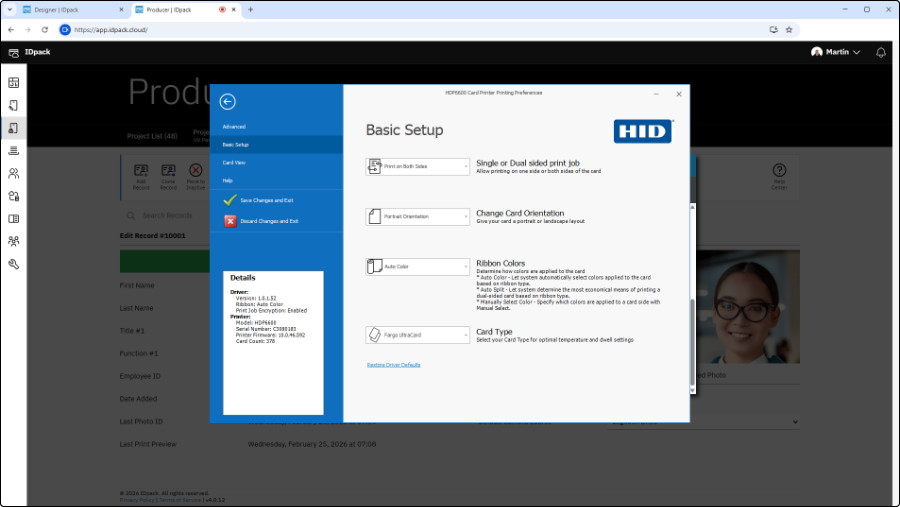
Click More settings to open HDP6600 Card Printer Printing Preferences.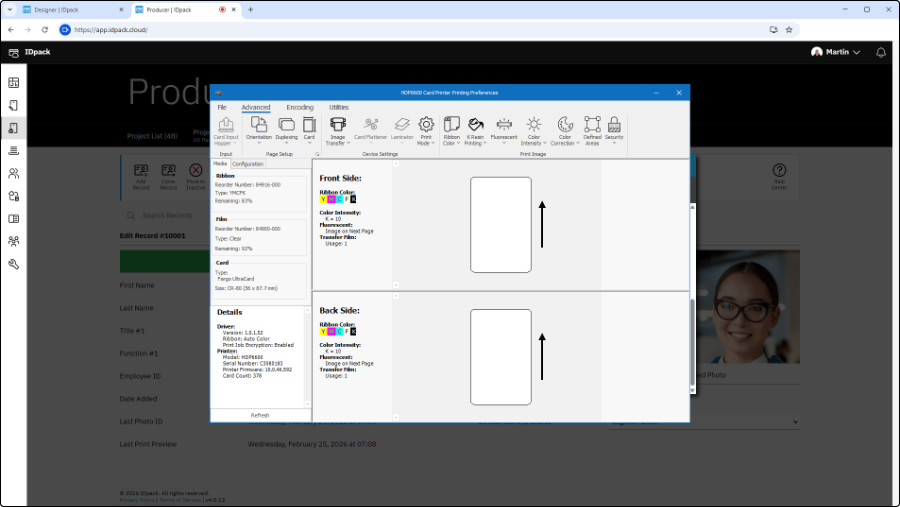
On the left, click Advanced.- Click the Fluorescent icon with an arrow.
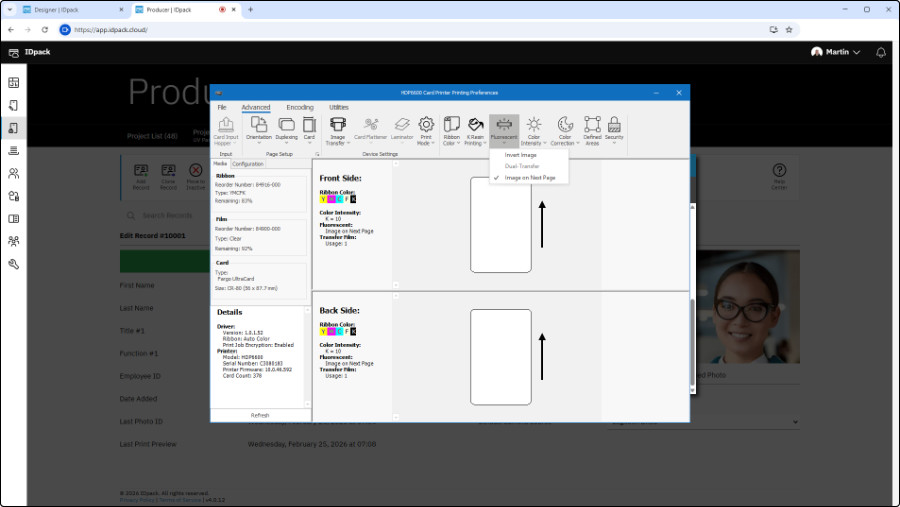
In the dropdown menu, select: Image on Next Page.- On the top menu, click File and on the next screen, click Save Changes and Exit.
Step 6: Final Print and Inspection
- Return to the Windows print dialog and click Print.

Observation: Watch the printer LCD; it will display Printing Fluorescent when printing the F panel. That means it is working.- Safety First: When the card is finished, use a small UV flashlight to inspect it. A basic UV flashlight is inexpensive and widely available.
- Warning: Never look directly into a UV light source with your eyes.
- Here are the results:

Best Practices Summary
- Contrast is King: Use 100% black for the strongest UV glow.
- Negative Filtering: Always invert Photo IDs for the most realistic UV appearance.
- Layering: Ensure your UV elements don’t “fight” with the Black (K) panel for space.
- Test: Always run a single test card before a high-volume production run.
Why IDpack Handles UV Printing Better
IDpack delivers true object-level UV control. Instead of forcing a full-card negative conversion, each UV element can be configured independently, allowing precise use of filters such as Negative on Photo IDs while maintaining full control over logos and variable data.
With native 600 DPI optimization for the HID FARGO HDP6600 and automatic grayscale mapping tailored to the Fluorescent panel, IDpack produces sharper UV detail, stronger contrast, and more consistent security output.
Most importantly, IDpack dynamically generates a unique UV panel for every individual record. Variable data, employee IDs, and Photo IDs are rendered dynamically per card, meaning no two UV prints are identical. Many traditional systems rely on static UV artwork, resulting in every card glowing the same under ultraviolet light. By contrast, IDpack’s dynamic UV generation significantly increases security and makes unauthorized replication far more difficult.