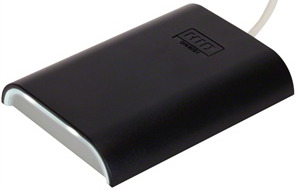
IDpack Cloud supports Contactless Card Readers (RFID) with a Keyboard Wedge (KBW) emulator using JSON output.
| We tested our system with an OMNIKEY 5427CK Gen2 from HID, but it should work with any Proximity or Contactless Smart Cards with a Keyboard Wedge (KBW) emulator. In KBW mode, the reader outputs data as a series of keyboard keystrokes to the host as configured. The examples below are based on the OMNIKEY, but they can be applied to any model; only the way to configure your device will change, but the options should be the same/available. |

|
This feature is available with an IDC Professional or IDC Enterprise subscription.
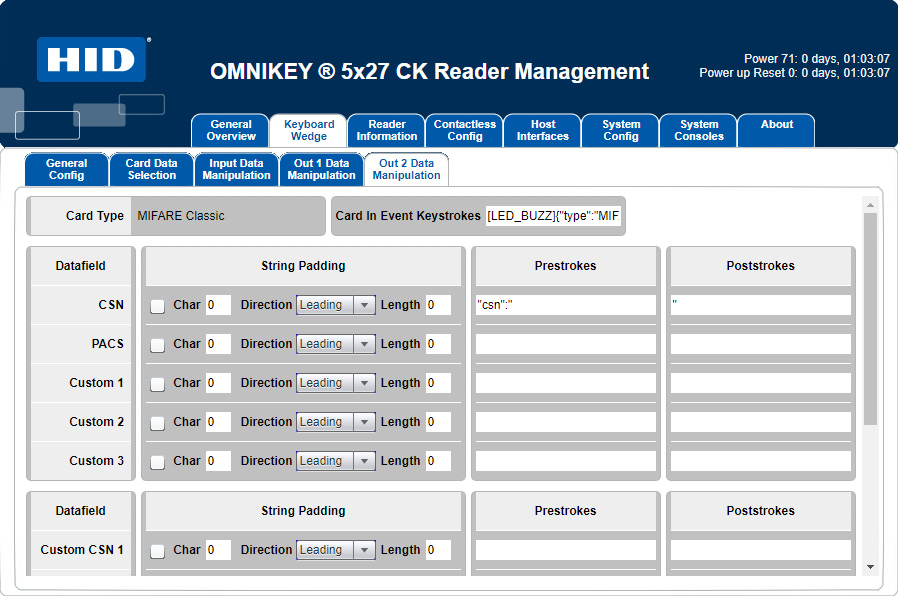
How it works: Readers can be configured with different events, and we format the output to our needs using those events. By default, readers push the info in HEX without any formatting. The most popular way to exchange information is JSON. So, using the OMNIKEY ® 5×27 CK Reader Management (webserver), we added a configuration for Card In Event Keystrokes, Prestrokes, Poststrokes, and Card Out Event Keystrokes to obtain a JSON output like this:
{
    "type": "MIFARE Classic",
    "csn": "525148402"
}
All the information received is saved in our secure database in the cloud and is available through each Record Information and API.
The JSON received from the reader is saved in the idc_rfid_json. You can add as many fields as you want in the JSON, if you need to pass more than the csn, like the Facility Code, Card Number, Site Code, City Code, or OEM Code, you can. The information will be kept in the field idc_rfid_json, which you can retrieve later via the API.
If the field type (Card Type) and csn (Card Serial Number) are found in the JSON, they will be kept in their respective fields: idc_rfid_cardtype and idc_rfid_csn.
Note that the field csn is used by IDpack Cloud as a search key when reading a card in the Records List. If a csn matches a record in the list, it will show the record.
Setup to format JSON package for the OMNIKEY 5427CK Gen2.

Enable only the card formats you are using in the Card Data Selection, e.g., Mifare Classic and Generic ISO14443A.
It will make the response time from the device much faster.

Below are the different steps to set up your OMNIKEY reader. First, start a supported web browser and type http://192.168.63.99/ into the address bar, then press Enter. The OMNIKEY 5×27 web server page launches with the General Overview tab selected. Next, make the following configuration. You can always Restore to Default from the System Config tab.
- Keyboard Wedge
- General Config
- Keyboard Wedge Enable: Checked
- Boot Interface: Uncheck
- Card Out Event Keystrokes: }[ENTER]
- Allow prestrokes and poststrokes for errors: Uncheck.
- Tech order after error: Uncheck
- Enable Keyboard Wedge Encryption: Uncheck
- Card Data Selection:
Select from the Pull-down menu the Card Type you want to edit. e.g., Enable MIFARE Classic. This will determine the next tab setup. If you need to support more card type, repeat the steps for each card type. Uncheck all card types you won’t use.- Card Data Selection:
- Enable “Card Type,” e.g., Enable MIFARE Classic: Check
- Enabled: Check only CSN (on some models, CSN is not available, leave PACS checked)
- Input Data Manipulation:
- Nothing to change
- Out 1 Data Manipulation:
- String Format: DEC or HEX, depending on your needs (we select DEC by default)
- Out 2 Data Manipulation:
- Card In Event Keystrokes: [LED_BUZZ]{“type”: “MIFARE Classic”,
- Datafield, CSN (on some models, CSN is not available; use PACS)
- Prestrokes: “csn”: “
- Poststrokes: “
- Card Data Selection:
- General Config
- Contactless Config
- Tech Order
- Push your preferred Card Type to the top of the list; reading a card will be much faster.
- Tech Order
- System Config
- Click “Apply Changes”
- wait 5 seconds
- Click “Reboot System”
How to test the reader
First, you can test the result in the System Consoles tab -> Debug using the OMNIKEY ® 5×27 CK Reader Management, but we recommend the next step.
Next, you can test the result with Notepad from Windows. Open Notepad, read a card, and you should see the output. Cut and Paste the output to https://jsonlint.com/ and click Validate JSON to ensure the format is perfect.
At last, test with the IDpack Cloud page Technologies We Are Using. If you see the result to the right, everything is working, the reader should work in Badge Producer.
To write RFID cards in IDpack Cloud
You need to activate the RFID feature in a project. Open your project in Project Designer, select Yes in the Contactless Card Reader pull-down menu, and save. Now, click “Open in Producer”, click a record, and read a card. The information should update, then click Save Record.
Do not add any RFID fields to the Field Definition in the Project Designer. With the Contactless Card Reader set to Yes, IDpack Cloud will add all the fields automatically.
To read RFID cards in IDpack Cloud
Open a project with Badge Producer, and from the Record List tab, read an RFID card, if the CSN is found in the records, IDpack will open display the record.
